Getting started, getting inspired

One may say- A food blog? Really, why?

I say- why not?

Blogs are pretty mainstream these days; a couple of my friends have started theirs, with phenomenal pieces of fiction adorning them. It’s a pretty unnerving experience, to say the least- having strangers read your pieces and opening your blog to their varied interpretation. I , being a sucker (well, somewhat) for the conventional, thought, “what would it be like to have my own blog?”

However, reality dawned upon me, and I realised I could neither write poetic verses nor pen down elegant pieces of literature.

So that particular afternoon, I thought, “hmm, so what CAN I write about,if I were to have a blog of my own?” And it struck me- at that very moment, I was watching one of my favourite food bloggers cum chefs cum entrepreneur cum a lot of other things, Rachel Khoo’s show on TV- that one of the things I love the most, so much so that I could write about it, is food.

The sin of gluttony? I’ll be damned.

It’s difficult to say when my infatuation for food blossomed into a full-blown love affair, but I know now, that it’s one of the things I absolutely adore. My parents, their friends, and of course, my buddies, too got a whiff of my passion, and they were very supportive when I shared my idea of starting a “flog” (yes, my best friend penned that) with them.

Food, for me, is a lifestyle. It gives me so much pleasure to discover new cuisine, visit different places and get a taste (quite literally) of their culture, to recreate all the dishes I read, or watch. I’ve always had that insatiable hunger (too many puns) to learn new techniques, recipes and there’s nothing more I love than reading new cookbooks and watching my favourite chefs’ shows. And yes, I have been thoroughly inspired by so many- Nigella Lawson, Jamie Oliver, James Martin, Adam Richman, Gordon Ramsay, Chuck Hughes, Rachel Khoo, Rachel Allen, Donna Hay- to name a few. Closer home, there’s only one person who’s been the most inspirational, and that’d be my lovely grandma. That lady was a wiz in the kitchen, even in her last days, her hands churned out the best foods I have ever tasted. A plethora of hand-me-down cookbooks from famous authors is what I will always treasure.

My mother recently asked me why I wouldn’t study culinary arts and make a career out of it? (For all of those who are wondering, I’m a girl of science and intend to do something with biology)

Although, I wouldn’t deny that this thought of studying culinary sciences didn’t cross my mind, I was never conflicted by it. I am passionate about food, and if I make a career out of it, I fear my passion and love will eventually wear off. I never want to “retire” from food; the thought of it petrifies me. I want to hon my skills, see new places, eat delicious food, reproduce them and better my techniques. That’s why I thought writing about something I love will communicate my feelings across the globe.

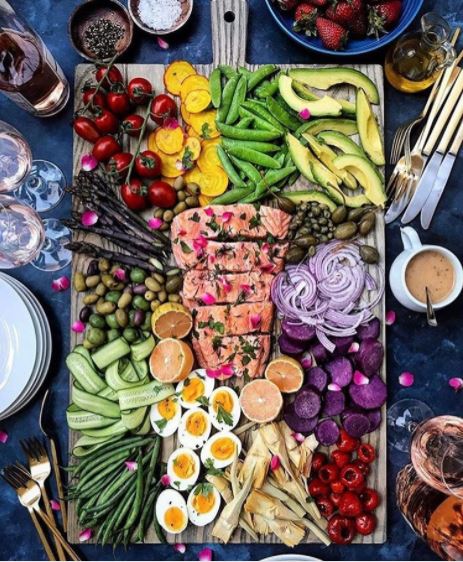
But I didn’t want a “conventional” food blog, with only recipes and pictures. I wanted it to be a fresh and new gastronomical quest, a means of finding the best and spreading the word about it. I wanted to document my expeditions around the globe and the various cuisines I had the opportunity to come across. I wanted it to be a journey.

That’s what I intent to do with my blog called “It’s Fraîche!”(yes, the crème fraîche, fraîche. I know, ingenious.)

Of course, there will definitely be recipes; who doesn’t love that!

But not just paragraphs of instructions and techniques.

I want it to be a rewarding expedition into the gastronomical world.
Here’s to you, my readers. Thank you for tuning in, and I promise, I will leave your mouths drooling.

—————————————————————————-

Trisha Nair, author and curator of “It’s Fraîche”

Why the ‘Unicorn Food’ Trend Needs to End Right Now

The popular saying that goes ‘never judge a book by its cover’ holds true when it comes to the ‘unicorn food’ trend, except there is a tiny twist- the ‘book’ is usually more pathetic than the cover itself. I know I’m treading into unchartered waters here as I will be voicing my unpopular opinion since Unicorn Food is massively popular on social media, but I need to let out my frustration, so do hear me out on this one because I refuse to join the bandwagon.

giphy

Let’s start with a history lesson, shall we? If we take a trip down memory lane, we find that people were always obsessed with unicorns, shimmer and colours. Now it’s completely acceptable to fancy them and I am not debunking them at any costs. However, it’s 2017 and obviously, people will take something and blow it up to epic proportions till it becomes sheer absurdity and insanity. I’m here to talk about the gastronomical scenario, but let me also briefly delve into how ‘magical unicorn’ makeup, associated with drag, is being heavily popularised by Instagram beauty gurus, thus stealing the techniques and the themes from drag make up which has been around for centuries. That is like taking one aspect of a rich community and defacing it.

And so this mad scramble for all things unicorn continued and now we’re at a place where even food isn’t spared. This makes me utterly livid. I never really bothered looking into the fad until I came across the revered Unicorn Frappuccino endorsed by Starbucks. I was intrigued at first, and I’m not going to lie, I was really excited too. This led to an impulsive purchase of a Grande Frappuccino which came to a whopping 6-something Canadian dollars, (mind you, I could have bought 2 Venti Cold Brew Iced Coffees with that money) followed by instant regret and copious questioning of my decisions leading up to this moment. Not only was this drink horrible, it was P U R E  G A R B A G E. I was repelled by it instantaneously, mostly because I was confused at the taste of whatever the heck I was drinking out of that cup. It was an awful blend of diabetes-inducing sweetness, blackout sour and… crunch from the sprinkles? Honestly, don’t even ask me.

There was a time when coffee and frappuccinos were simple yet decadent. Can we please bring that back in its full glory?

uni

photo credit: @nairtrisha on Instagram

But what really struck me is how THOUSANDS of gullible people, including me, went after the ridiculous trend and purchased it. It’s great marketing skills if you ask me because the main purpose of the drink was to look good. People were going to buy it anyway for the way it presented itself, and even if thousands of people buy it once, it’s still a lot of money made. No need for seconds, the profit had been procured anyway.

So what is so starkly attractive about this trend? Well, the looks and the aesthetics of course. And that’s what sells in today’s world. In this age of social media and photo-sharing apps, people live and breathe to document their lives and adventures online, and so filling those Instagram feeds with brightly coloured food was merely a step of the process. It is so easy to live life online now, that even food has lost its delicacy and beauty. Who cares if it tastes good, at least it looks visually and aesthetically pleasing, which is the key ingredient needed to start a brand new craze. Food used to be hardly too expensive yet simple and fulfilling, till it got tarnished by the need of it to look ‘over the top’ and ‘extra’. This is not even about presentation, it’s about the fact that the most bizarre food takes the crown for being a crowd pleaser. Yes, I agree there are many ways to make the mundane more fun, but that doesn’t mean you’ll douse ANYTHING AND EVERYTHING in terrible amounts of artificially sourced colouring and mask any flavour with inhuman amounts of sugar. (Did you know that a tall unicorn frapp had 39 grams of sugar in it? Guess it’s time to keep the insulin handy)

uni

photo courtesy: @hungrybocagals on Instagram

And it didn’t even stop there- heck, it didn’t even start there. Rainbow bagels aka poor bagels massacred by rainbows of artificial colours, rainbow grilled cheese (I still like my cheese yellow, brown, orange and beige, thank you), rainbow buns (why.), and the most recent rainbow Mexican food (oh god, stop this) are all a part of the global dehumanization of simple foods. And I get it – you’ll tell me that red velvet is not naturally red, but at least it is a type of cake, not all cakes are painted blood red and inspire a train of humans to popularise it extensively. It’s cute, decent, not abundantly preposterous or prevalent in every corner of social media. Remember the time when your grandmother’s hearty casserole or your father’s meticulous barbecued meat was the best food you’ve ever had? That was the time when simplicity and authenticity ruled; when taste was important, and when social media didn’t ruin our lives. If you want chef approval on this idea, look no more- Anthony Bourdain said some pretty stellar words about this maniacal scene too. (faith in humanity not entirely restored, but it’ll get there eventuallly)

Capture

photo credit: @thefoodiesaur and @chompeatery on Instagram

With this, I firmly believe that it’s time we start seeing real food being glorified again and leave those boisterous, rainbow-coloured edibles (which you cannot even classify as food) alone. Let’s do ourselves a favour and bring back the good ‘ol recipes which always used to leave us satisfied and craving for more. As far as business is concerned, I bet wholesome hearty food brings back customers much more often than one-time hit wonders that we are so familiar with today.

Capturem

photo credit: @foodandcuisines on Instagram

The Day I Gloriously Messed Up an Apple Pie

                                IT’S OKAY TO MESS UP
                                *internal screaming*


Now, see, according to my family, friends and a few relatives I didn’t know existed, it was a GREAT pie.
The crust was home-made and flaky and the filling tasted divine.

But I KNOW I messed up, and in this post I’m going to elaborate on the fact that I did, so that,hopefully, you won’t do the same things that I did. I’ll try not to be too hard on myself.


I am going to speak about the right things that I did, and then of course, highlight my grave mistakes.

For starters, this is the pie.

IMG_2932

Now, let me start off with the basics. I went for a home-made crust, which I managed to make from scratch for the very first time. This is what I did-to the all-purpose flour, I added the salt, after which I literally crumbled the butter and flour together with my hands. The texture of the mixture should ideally resemble course, almost powdery, but not fine, crumbs. Recipes might say that you can use a food processor, but working the mixture with your hands is the best way to get the desired texture and to know if the ingredients have been thoroughly combined. To bring the mixture to a dough, I added ice-cold water , one tablespoon at a time, till it formed a pretty good-looking dough. The recipe also called for refrigerating it for at least 4 hours, but I went YOLO and I shoved the dough (which I divided into two parts) it in the blast freezer for about 10-13 minutes. Thug life? Yeah, maybe. But yes, PLEASE chill the dough for at least 4 hours, if not overnight. It makes the dough much more malleable and prevents its shrinkage while baking.
If  you’re a noob at making a dough, let me assure you; it’s going to be tough. Pro tips include cold butter instead of lard and of course, not too much water, otherwise the crust will be as tough as a math questionnaire. But the area where I faced the most difficulty was the rolling. It kept tearing, and I had to keep rolling it, and I think the crust would have been flakier if I had not rolled it too many times, because doing so must have melted the butter in the flour. For an extra flaky crust, the butter chunks must be pressed out and flattened between the layers. Rolling the dough more than usual will evidently cause it to heat up (yes Chemistry, I acknowledge you now) and, eventually melt the butter in the dough. And that’s probably why my crust was shortbread like flaky, not DISTINCTLY PIE CRUST flaky. It may not make much of a difference to the commoners , but it sure did kill me. ALSO, use a deep dish pan. Please. Don’t do what I did. USE A DEEP DISH FOR CHRIST’S SAKE.

I didn’t blind-bake the crust, and I’m not sure if you really have to but yes, I don’t know, I’ll look that up, but from what I can gather, baking it twice will make the crust too hard. Investigation is on its way, nevertheless.

So that was the crust, now on to the devastating filling.
(wow I sure do know how to bring myself down)

To be very honest, I really did not know that the choice of apples made a difference. It’s really dumb to think all apples have the same amount of pectin, and thankfully the apples that I chose didn’t break down in the oven and brown unnecessarily, but I thought since I’m talking about filling I’d mention this key factor anyway.
The best apples for a pie are the ones that are still soft on baking but can hold their shapes and are not mushy. Also, a tart apple does a much better job. I don’t know where you stay, but go on and experiment with the apples. I could not find any Granny Smith’s or whatever apples the Americans use, but yes, do experiment, if you can’t find the designated type of apples. When you’re making the filling, cut the apple into small, chunky slices.Don’t make it wafer thin. The apples are the highlight of this pie. Don’t steal its thunder. Add brown and white sugar, and cinnamon to the cut apples and keep aside. I cannot begin to tell you how necessary it is to add the sugar and let it sit, as it draws the water out of the apples and gives way to a moist, but not soggy filling. Here’s where I went wrong; I didn’t let it sit in the sugar for too long, and I bet the base of the pie would’ve been a little less mushy if I did. I also read somewhere, that the juices that have been drawn out of the apples can be reduced and made into a glorious syrup to enhance the flavour of the filling. I will definitely try this the next time I make an apple pie.

IF I ever make one again

I didn’t add flour and butter to the filling, as I didn’t want an apple crumb pie (yes, there’s a difference), so you can do that if you like. Also, never, ever over-season your filling. You want the filling to taste like apples, not cinnamon or nutmeg. That’s just ew.

IMG_2945

Filling done, proceed to the FILLING (lol, wordplay) of the pie crust. Now if you remember, you had two halves of the dough. The first one is to be rolled out and made into the crust, and the second one needs to be rolled out too, to form the upper crust.
Now here, is where you’ll feel like killing yourself.
If you don’t do it in the first go, you’re allowed to go to a dark corner and cry.
Hold the rolled out dough on the top of your hands, palms facing down, hover over the pie dish and gently lower it, making sure you can , somewhat, see the impression of the apples, but holla! be careful don’t tear the dough apart. Practice will make it perfect, don’t worry too much.
Then you go on to the fancy decorative part of the endeavor , which involves the dough ‘leaves’, and the basic baking ‘making slits in the crust to let the steam vent’ tip and the crimping. As you can see, my crimping SUCKS, as I didn’t have enough dough for the upper crust. I had to carefully pull it so it, at least, sealed the goddamn top.
OKAY SORRY I WILL BE PRUDENT AND WISE THE NEXT TIME AND MAKE ENOUGH DOUGH.
I will also try to crimp properly.

IMG_2933

And oh, do yourself a favour? PLEASE brush the crust with egg wash so that it looks attractive, shiny and golden AF. Unlike my one, which low-key looks sad and dull.


So that’s that. My really pathetic but okay-ish tasting pie. Yours will probably be better than mine, but yes, you’re welcome for this post. I really hoped this helped. I would love to hear about  pie fails from my lovely WordPress bloggers, so don’t hesitate to comment! I’d love me some company so that I can vent and crib. Thanks for reading! x


Espresso Oreo Cheesecake

A twist on the classic cheesecake with Oreo biscuits base and a creamy, rich filling with a delicate coffee flavour.

IMG_2919.JPG

Ingrédients

  1. 24 Oreo biscuits, crushed or pulsed in a food processor
  2. 2 tablespoons melted butter
  3. 4 packets (8 ounce) Cream Cheese ( I used a mix of low-fat and full fat because guilt-trip)
  4. 1 and 1/2 cups of caster sugar
  5. 3/4 cup milk
  6. 3 eggs
  7. 1 cup sour cream ( I used a mixture of fresh cream and yogurt, about 70-30 respectively)
  8. 1 tablespoon vanilla extract
  9. 2 heaped tablespoons all-purpose flour or cornstarch
  10. 4 tablespoons instant Espresso, brewed

Modus Operandi

  • Preheat oven to 175 degrees Celsius, grease a 9 inch springfoam pan.
  • In a bowl, mix crushed biscuits and melted butter, press on to bottom  of pan, firmly. Blind-bake in the oven for about 10 minutes.
  • In the meantime, cream the sugar and the cream cheese until smooth af. Blend in milk, and then mix one egg at a time, do not over-mix. Incorporate the sour cream (yogurt-fresh cream), vanilla, flour,and coffee until smooth. Pour onto the pre-baked crust.
  • Place water bath directly under the baking rack of the oven. Bake in pre-heated oven for 1 hour and 30 minutes-ish, or until the center of cheesecake has a nice jiggle to it. Then turn off the oven, (EXTREMELY IMPORTANT)  and let it cool in it for the next two-three hours. Chill in refrigerator overnight, once cooled.

You can use Chocolate Buttercream Frosting to ice the cooled and set cheesecake (recipe to follow)

Also, you could read the previous blog post here for tips, tricks and all the important and crucial stuff of Cheesecake Land.

Thank you, and happy baking  x

The day I successfully made a Cheesecake

Before I start, let me remind you that I’ve had 4 (yes, FOUR) failed attempts at making a cheesecake. I was so frustrated with my failure that I cringed every time any one mentioned the word , cream cheese. I was reconsidering my decision of making this cake today; I kept thinking that I could easy use the gorgeous cheese to stuff a filet of chicken and deep-fry it (now on second thoughts, that would’ve been a bomb idea too).
Anyway, I  started making it nevertheless, and I must say , I did it. I made a pretty darn good cheesecake. *pat on the back*

Now , to all the people who’ve had several such failed attempts, fret not. It’s actually really easy and the results are, kind of, rewarding, if not guilt-free.

I did my research on cheesecakes and its techniques, and I was hella startled when I realised I had been doing it wrong all this while. So without further ado, let me break down the science of cheesecake making for you.
IMG_2916
(This is the Espresso Oreo Cheesecake that I made )
Okay, so. Rule number one, which I ALWAYS overlooked. It is extremely important for all your ingredients to be at room temperature. If all the stuff isn’t at room temperature or even as the same temperature of the others, they will not combine as effortlessly,  which means you have to compromise on the smooth, fluffy and creamy texture of a typical cheesecake.
IMG_2889
Once the ingredients have been assembled , it’s all about getting it together , but before we go to the bashing and the mixing, let’s direct our attention to the baking pan. You must invest in a Springfoam for cheesecakes, otherwise what’s the point? You’ll try scraping the bottom of a normal pan, ending up with a deconstructed cake. ¯\_(ツ)_/¯
I have a bent-bottom pan, for which I always have to make a blanket of aluminium foil to prevent the cheesecake mixture from running and creating a hellish mess.

Once you’ve gotten the weapons together, it’s time to bash the biscuits. I beat the living daylight out of 24 Oreo cookies, which formed the crust of the cake. You can use a food processor to blitz the crumbs, but I find it rather therapeutic to massacre the biscuits by hand. A key point to remember- make the crumbs layer as even as possible. It might feel like there isn’t enough crust, but there always is. Believe in yourself, and in the cookies. After pressing it down firmly on the base of a springfoam pan, I blind-baked the crust for about 10 minutes in a preheated oven at 180 degrees Celsius. I find this typically helpful because the crust turns out nice with a beautiful crunch, and it also holds up the liquid mixture fairly well. Some people freeze the base for a while, I prefer blind-baking it.
IMG_2897
Now for the filling. Let me ‘fill’ you in on this first- do not even think of hand-blending it. At first I thought, Ah I have muscles and time, so why not use them ? Twenty minutes later I found myself standing next to the processor while it whizzed away, doing its thang. You are looking for a bump-less, smooth texture, which you will never achieve by hand mixing. Unless you’re Superman. Or Arnold Schwarzenegger. You get the drift, right?
Oh and yes, while making the filling, follow the recipe to the E. Don’t add too many eggs, add them one at a time, do not over-mix the batter, just incorporate the raw materials once you’ve processed the cream cheese and the sugar.

So once this is done, you’ll probably think that now it’s just baking and that’s easy stuff.
HAHAHA no, sorry to burst your bubble but that’s the make or break point of baking a cheesecake. When placing the cheesecake in the oven, also place a shallow dish of water underneath the pan. The steam bath gives way to the moistest , most jiggly, near-perfect cheesecake. Some bakers omit this since they’ve already used a bit of cornstarch or flour in the filling, but I used both methods, and I think I liked it. The cake was not too dense, but also not falling apart.
IMG_2899
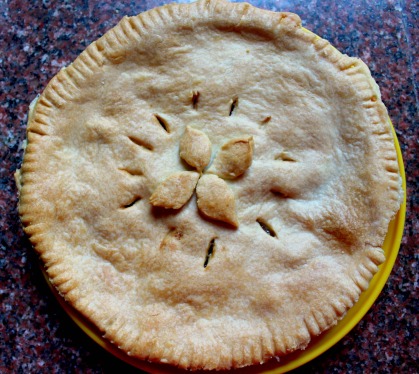
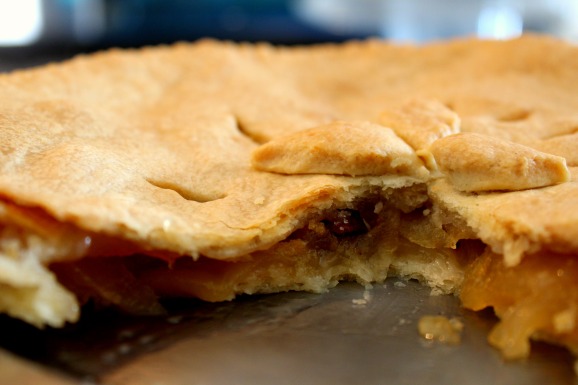
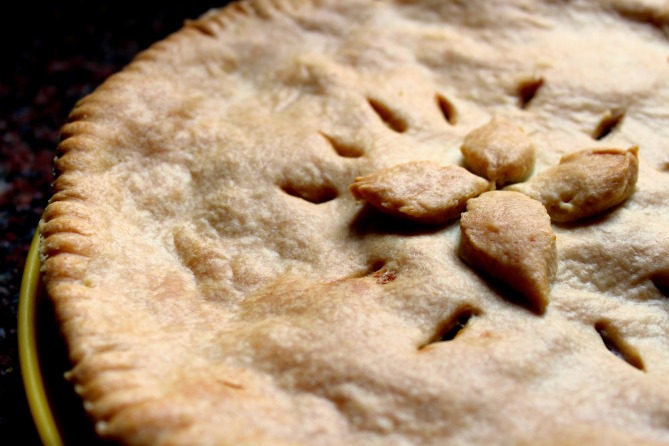
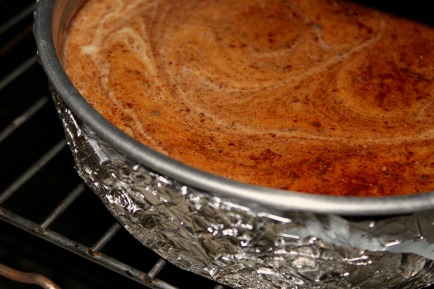
Now, just let the oven do it’s magic. DO NOT PEEK or steal a look. Patience is key. If I can be patient ( I was always the fidgety one in the family) , so can you.
Bake for the designated time, and once it’s done you know its baked properly when there’s a slight jiggle in the center and the sides have hardened slightly. I swear by keeping the cheesecake in the oven even after baking, and let it cool completely before transferring to the fridge to cool overnight. If you don’t cool it, and pop it in the fridge straightaway, it’s invariably going to form the dreaded cracks. After all the hard work you’ve put, you wouldn’t want stupid cracks to steal your thunder now,would you?

Let it set over night. And you’ll be ready with the most gorgeous Cheesecake you’ve ever made! Now , go on, frost that baby up, decorate it, but not too much. Let the cake do the talking!

IMG_2905
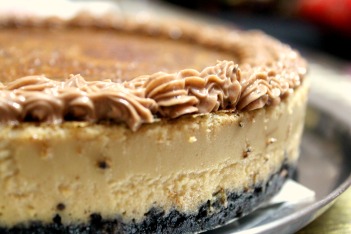
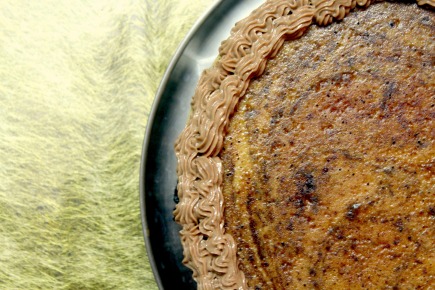
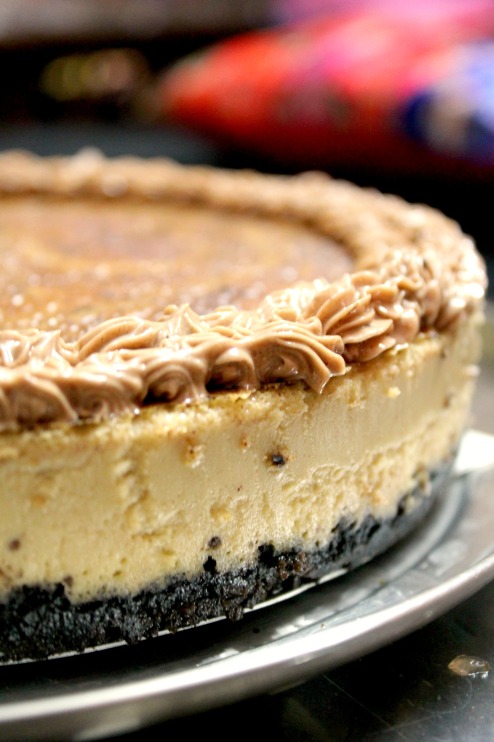
So there you have it! Fool proof Cheesecake goodness! I’ll put up the recipe to my Espresso Oreo Cheesecake with Chocolate Buttercream frosting soon! Thanks for tuning in! Happy baking x

Fraiche on the Block- Daniel Seidman

Today, on Fraiche on the Block is Daniel Seidman, a chef who can give any high end bistro a run for their money. Untitled

Simple, elegant, fast food- conveying a plethora of emotions, colours and moods from his vivid pictures, Daniel now has his own website.

Do follow this multi-talented chef on Instagram and check out his website here.

Untitled

Rustling Up Those Leftovers- delicious food that you can make in a jiffy!

How many times has this happened to you – you walk up to your refrigerator, imagining all the lip-smacking treats in store for you, only to be confronted with the harsh reality that your humble fridge ONLY possesses bowls of leftover rice and some chicken carcasses?
Trust me, been there. Note to oneself – go to the grocery store more often.

But you know what? It’s okay, we all have our days. This doesn’t mean we won’t satisfy our guts, does it? Well, fret not, the Guardian Angel of Leftovers has answered your call! Following are some heavenly ideas which can turn any leftover into a meal; just what you wanted to satiate your midnight binges! (Click on the italicized text for the link to the recipes)

  • Leftover chapatis– The chapati is the indispensable household staple in India, and it’s quite often that you’d find these stacks of wholewheat breads in the fridge. You can give these rotis a delicious Tex-Mex cum Italian twist by just warming these in the microwave oven till they’re just warm, but still not crisp. Then top it all with tomato puree or ketchup, some bacon or prosciutto and cheese. Stick it in the microwave for a few seconds, till the cheese melts, and viola! Roti Pizza. Presto! OR turn it into a Tex Mex Wrap with some gorgeous filling of rice, black beans, salsa, lettuce, leftover chicken, guacamole and eggs! tortilla-wraps-426059skillet-tortilla-pizza-a
  • Cream Cheese– Make sure that the packet has not been left over for over a week, otherwise it wouldn’t be good to use. Nevertheless, this one recipe is an all time favourite, for it is quick, easy and looks sophisticated AF! Plus, it’s a treat for the people with a sweet tooth. This Cheesecake Parfait is your canvas- play with the toppings; use fresh fruits, Granola bars, rice crispies, chocolate, while keeping the base (ie, cream cheese and biscuit crumbs) the same. If you’re experimental, you c o u l d use Oreo biscuit crumbs. Basic recipe here . 1007p88-greek-yogurt-parfaits-m
  • Chicken- And the gastronomic king strikes again! (yes, quite obviously, he’s one of my favourites) Expect Jamie Oliver to turn leftover chicken carcasses and meat in to something so healthy, rewarding and downright mouthwatering! Try this  Frenchie Salad for happy days!IMG_6829
  • Cooked elbow macaroni pasta and good ‘ol leftover cheese- This is more of a d-i-y in 5 minutes than a leftover-put-to-use meal, but the very fact that it can be made in a mug in such a short span of time makes it the go-to food fix if you’re hungry AND in a hurry. The quintessentially American Mac ‘n Cheese, that comes in a mug is your new best friend.
  • Milk- Before you start bickering, please, hear me out. If you have an egg at your disposal, and some slivers of processed meat, then you’ll surely fall in love with this quiche in a mug recipe. It’s such a quick and comforting dish, you’ll just love it with all your heart.4f9eb13687e17.preview-300
  • Mint – this is for the times when your refrigerator has nothing but herbs (it’s rare, but yes, it did happen to me). Don’t be afraid- make an amazing Virgin Mojito a.k.a Spritzer out of it! All you need is water, sparkling water/soda/ Sprite, sugar, lemon juice (cheat code: you can use Tang or any other instant lemon juice powder available) and ice cubes, and you’ve made yourself a cooler that will rid you of the summer blues(and dehydration!). For a cheeky alcoholic kick, which I’m sure you wouldn’t mind ;), add in a dash of white rum (you could try with vodka, but the original Mojito uses white rum),and you’re set! P1010475